상품상세정보
 |
 |
 |
 |
 |
 |
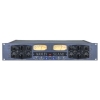
SLAM! stands for "Stereo Limiter And Micpre" and it pretty much describes what it will do to most VU meters. We had to put a switch on this limiter to drop its internal VU meters down 3 & 6dB to keep the poor little needles from bending– it'll get LOUD fast (hence the exclamation mark). And on top of being an amazing pair of (actually four) Limiters, and Class A tube mic preamps, it also has masters degrees in DI, AtoD and DtoA, VU and PPM but that was too much for an acronym.
When it comes to classic gear, especially classic limiters, we can all agree numbers like LA2s, 1176s, 2264s, and others come to mind. What if all those sounds were to be found in one stereo tube unit. Interested? We combined our favorite Electro-Optical circuit (ELOP?) with a damn fast FET based brick-wall limiter reminiscent of some cool classics. And we added a sidechain filter that can remove low frequencies that makes it more useful for a variety of tasks, while retaining that easy, "it just works" quality that has made it a favorite for vocals everywhere. The FET-based limiter has different desirable characteristics that both optimise the signal for digital recording, due to the brick-wall capability, and let you dial in how clean or crunchy, or punchy, and how loud and proud you want it. Manley is excited to announce the SLAM!
GET IN: The SLAM! starts with tube Mic Preamps on both channels with selectable phase reverse, high pass filter, and switchable phantom power (on the back panel). We’ve got plenty of gain for you in this new tube circuit, up to 60dB with 20dB more in the limiter– plenty for soft singers using low output ribbon mics. The input attenuator is right up front, like a variable pad so your loud rock ‘n’ rollers won’t cause a problem either. Track direct with the Direct Instrument input or bring your line level inputs into the SLAM! for processing. The DI inputs have selectable input impedance, depending on how far you plug the 1/4" cable into the jack: push it in all the way and the input impedance is 100KOhms, pull it out halfway and it becomes 20 megOhms which reduces pickup loading and allows all the highs to get through. Come on in!
Get it LOUD... two different and distinct limiters per channel:
The ELOP? LIMITER: Our beloved Electro-Optical Levelling Amplifier circuit, the ELOP?, still the favorite for vocal tracking, shows up here with its new switchable side-chain high pass filter making it much more useful for mixes and other tracks as well. One of the most appreciated aspects of our original ELOP? is the simplicity of a two knob limiter, which is optimum for demanding pro recording pressures. You can still grab two knobs and have complete control of level and dynamics and be ready to hit that record button. Intuitive controls and a straight ahead signal path through quality components simply work. The ELOP? limiter implementation is done like we did in our VOXBOX? which pioneered the idea of limiting the mic signal before it hits any active stage. The ELOP limiter moves to the line stage when LINE is selected. The ELOP sidechain provides different HP filters on a toggle. The 200 Hz setting has been tailored for vocals and adds a touch of de-essing.
The FET LIMITER: Here’s a new fast FET based "brick wall" limiter that spans the range of clean predictable limiting to the grunge and gravel that other FET based limiters are desired for. The FET RELEASE control allows you to dial up a variety of colors. There is even a "CLIP" setting that provides as round a shape as has ever been available. (Read more below about the CLIP settings.) We aimed at "sound" first, then experimented with circuits until we heard what we wanted discovering fresh approaches that provide a very wide range of useful dynamic control. For example, you can set up for a fast brick wall limiter with slower releases for minimum artifacts, or go with the faster releases to get some crunch and then get extreme loudness. The Attack control is unusual too providing the sonic control common with its historic brothers but very unusually retaining the zero overshoot “none-shall-pass” brick wall that defines a real limiter. And it’s punchy! As the saying goes, “Louder is better.” The SLAM! optimizes levels to analog to digital converters with ballz, warmth and loudness verging on silly or just clean and safe.
What is especially nifty is the ability to use the ELOP? and FET limiters together at the same time dialing in whatever amounts of each effect you like. Every limiter has its own character or sound and here we have combined two powerful world-class tools that can be uniquely blended and mixed to taste and purpose. Even the metering is appropriate for each limiter so you can easily see how each is contributing.
Metering on the SLAM! is exceptional. The two full size real VU meters show you the raw input levels, the final output levels, and the ELOP? Limiter gain reduction in the traditionally preferred format for visually displaying apparent loudness. VU’s are cool. Noticing how mastering engineers often need a switchable pad on their VU's because the "optimised" levels tend to pin the needles in the red, the SLAM! VU’s also have a 0, -3dB, -6dB switch to help with this situation. There are also very fast and super accurate multi-color LED ladder peak meters that display the input and output levels and the FET gain reduction, and some combinations. They will do Peak, Peak Hold timed, and Peak Hold until reset, and also allow you to manually set where the individual bars change colors to match your other gear. And with maximum clean I/O levels of +30 dBu, it is a lot more likely you will use these meters to see what’s clipping downstream. It probably won’t be the Manley tube line drivers inside!
The back panel should keep everybody happy. In the sea of jacks including the big power supply connector, you'll find all the usual XLR’s for transformer balanced I/O and 1/4" phone jacks for direct unbalanced I/O. Eight Bantam jacks in a mini-patchbay configuration handle the side-chain inserts and linking functions. You can insert EQs into the ELOP? and FET limiters, and there are more jacks for you to mix in an external signal into the side chains. Another pair of jacks provides for easy linking for 5.1 surround work if you have three or four SLAM!'s. It’s all here.
Speaking of Linking... all previous Manley dynamics units require both channels to be setup for near identical settings rather than the more common "just set the Left side". The SLAM! lets you do it both ways. The "L Side" method is the "STEREO LINK" mode and is quick and convenient but, like others, uses a mono mix for the side-chain. The "BOTH & EXT" adds the rear panel link jacks to the link buss so you could chain up several SLAM!s for linked surround work. Both or all 6 channels should be set similarly. This mode is usually better for mastering as it responds to the true peak level of the channels rather than an artificial mono mix.
Outside the Box, that's where the power supply is. The illuminated power switch turns on the external power supply. Keeping the power supply far away also keeps additional heat and magnetic fields away from the precious audio. The power supply is housed in a sturdy cast aluminum 7" x 4" x 5" box that is easy to mount to or place in the bottom of a rack. A seriously humongous 16 pin connector, and 6' multicore cable connects the two boxes.
The SLAM! also seems a natural as a mastering tool. The FET limiter works great on mixes, and the ELOP? now has a high pass filter switch that is spot-on for mastering. We offer a dedicated mastering version which eliminates the mic preamps, adds detented controls replacing the pots, and provides extra metering options. Manley compressors and EQs seem to be the most popular pieces of gear ever when it comes to mastering. The ultimate analog rack for the final important touches to the mix would have include the SLAM!, The Variable Mu? and The Massive Passive. Combine this with some digital processors of similar calibre and one has a respectable and very effective set of mastering tools. That Manley rack plus some Manley Microphones would make an ultimate stereo recording chain too. This is gear you’ll want to keep for a lifetime.
Features and Specifications
- Input Tubes: 2 x 12AT7A NOS GE specially selected by Manley Labs for lo-noise and stable bias
- Output Tubes: 2 x 6414W NOS USA dual triodes
- I/O: MANLEY transformer coupled Balanced Inputs and Outputs
- Micpre: Selectable 48V phantom power and PHASE REVERSE
- Gain: 60dB max Micpre, 43dB max DI, 20dB max Limiter Gain
- Input Impedance: 2000Ω Micpre, 1MegΩ DI
- FET Limiter: Attack: approx. 100μS; Release: 10mS to 2Sec; Ratio: better than 20:1
- ELOP Limiter: Attack: approx. 10mS for 6dB GR; Release: 2.5 Sec; Ratio: 10:1
- Frequency Response: 5Hz to 60KHz
- Maximum Output: +32dBm, +30dBm (into 1KΩ load)
- THD+N: <.05% @ 1KHz
- Dynamic Range: 115dB typical
- Output Impedance: 200Ω
- Power Consumption
Slam! Analog:
- 0.480 Amps (480 milliamps = 480mA) @ 120V = 57.6 Watts
- 0.240 Amps (240 milliamps = 240mA) @ 240V = 57.6 Watts
- Outboard Power Supply: factory set for 100V, 120V or 220-240VAC operation for original destination country's mains voltage.
- Operating Mains Voltage: changeable with power transformer re-wiring via switch and fuse value change.
- Mains Voltage Frequency: 50~ 60Hz
- Size: 19” X 12” X 3.5” (occupies 2u)
- Shipping Weight: 25 lbs.
Manufacturer's Suggested Retail Price
- Manley SLAM!: $7,400 USD
- Mastering Version SLAM!:
$8,600 USD
- Digital I/O Interface option: WAS $2,500 and is NO LONGER AVAILABLE since 10/2009
TECH Notes and Upgrade Information
NOTE: The DIGITAL DAC/ADC OPTION for the SLAM! Has been discontinued 10/2009:

The digital inputs and outputs were on XLR's for AES/EBU standards and there was also a BNC for Word Clock and Super Clock input. The BNC was added for users' convenience and not just to help the unit's jitter performance. The jitter spec was "Almost Zero" and just about unmeasurable regardless of whether it was locked to its own crystal, the AES input, or the Word/Super Clock. A 7-way rotary switch selected 44.1, 48, 88.2 or 96K, AES IN, Word Clock and Super Clock, for the AES output data rate. Notice we didn't say "sample rate". This ADC and DAC always used the internal 192K sample rate! Truly amazing sample rate converters based on SHARC DSPs were used to almost eliminate (not just reduce) jitter and provided the sonic benefits of 192K sampling, even at 48K or 44.1 data rates. These were very fast exceptional sounding world-class converters.
The
ADC also had a pair of switches for DITHER and NOISE SHAPING and WORD LENGTH,
plus something unusual: a filter select switch. We believed that the
manufacturer's choice of filter was one of the biggest differences that affected
the sound of a converter, so we gave the user 3 choices, 80K minimal effect, 20K
Analog, (a passive filter similar to the 18K on the Massivo), and a 20K Digital
FIR for something comparable to other converters. There were also 3 filters on
the DAC side set for 20K, 40K gentle, and 80K. All of these were passive and
quite subtle and useful. There was a dedicated balanced +4 phone jack output for
the DAC, so these could be tube-converters or high end solid state. The ADC was
similar, but tube or passive(!) front end, that allowed a mastering EQ to be
cleverly used in this chain.The DAC output was always available. There was even
a twisted way (called "Expert Mode") to patch the SLAM! so that one could have
the MIC PRE/ELOP feeding an EQ, (or some other thing), returning back to the
SLAM! to drive the FET LIMITER, meters, and the A to D converter. Digital
I/O Interface option: was $2,500 and is NO LONGER AVAILABLE since
10/2009 
SLAM! Digital I/O Interface Option Specs:
- DAC: AES 24Bit 192KHz upsampling from 44.1, 48, 88.2, & 96KHz
- A to D: 24Bit 96KHz
- Power Consumption Slam! Digital:
0.688 Amps (688 milliamps = 688mA) @ 120V = 82.56 Watts
0.344 Amps (344 milliamps = 344mA) @ 240V = 82.56 Watts
UPGRADE: MANLEY SLAM! Digital Versions before 1/2006
PURPOSE: To add cooling fans to Manley SLAM Digital Version so the converter board does not overheat.
Serial numbers for units that will benefit from this update are:
SLAM 000-291 that have a "D" suffix which had the factory-installed Digital I/O card installed before 1/1/2006. MMSLAM 000-043D that have a "D" suffix which had the factory-installed Digital I/O card installed before 1/1/2006.
ANALOG ONLY UNITS ARE NOT AFFECTED. ALL DIGITAL SLAMS SHIPPED AFTER 1/1/2006 ALREADY HAVE THE FAN KIT INSTALLED.
For FAN KIT installation procedure, please click here.
TECH NOTES: MANLEY SLAM! Digital Versions
PURPOSE: To replace the Anagram Technologies ADC Module if it has failed due to high heat conditions.
Serial numbers for units that this applies to are: Any serial numbers suffixed by "D" with a failed A to D module.
For module replacement procedure, please click here.
UPGRADE: MANLEY SLAM! ADDING DIGITAL CONVERTERS:
PURPOSE: Add the Anagram Technologies ADC/DAC converters Digital I/O to an analog SLAM!
Serial numbers for units that will benefit from this update are: Any serial numbers suffixed by "A"
To add Digital I/O to your analog SLAM, please click here.
UPGRADE: MANLEY SLAM! Digital Versions only 5/1/2003
PURPOSE: Update the Anagram Technologies ADC Module to Software Version 3 to speed up clock estimation routine.
Serial numbers for units that will benefit from this update are:
SLAM 000-005; 022-095, and 119-121 which had a factory-installed Digital I/O card installed before 5/1/2003. ANALOG ONLY UNITS ARE NOT AFFECTED. MASTERING VERSIONS ARE NOT AFFECTED. DIGITAL CARDS SHIPPED AFTER 5/1/2003 ALREADY HAVE VERSION 3 SOFTWARE UPDATE.
For update procedure, please click here.
Some SLAMMY questions. Actual email correspondence:
From the FAQ page:
FAQ #11. Are the micpreamps in the SLAM! the same as the ones in the Voxbox?
Read the this page again and note the word "new". The mic preamps in the SLAM! are similar to the input stage of the Steelhead actually.
Question: The SC Filter seems to work backwards from the description in the manual. When I switch it to the 200Hz position, I get more gain reduction on a bass heavy program sources not less.
It is not backward, it is level compensated (more or less). The 100 Hz setting has more gain than the 'flat' and the 200 Hz setting has more gain again plus has some extra HF boost for mild de-essing. On mixes, it often does seem over-compensated, and on many individual tracks it seems under-compensated so it is just a compromise. Without the compensation, the threshold jump tends to be more disturbing and annoying, especially the 200 setting which often made one turn the ELOP? threshold to max. Adding more pot range just made it more difficult and touchy to set.
Question: What's the deal with the CLIP thing on the Release switch and the CLIP and BOTH settings on the Mastering Version SLAM!?
The Slam! Mastering Version includes a mode called "CLIP" on a rotary switch where the Input Switch lives on the regular version. This "CLIP" setting is a fixed ceiling that is included to prevent "Overs" or digital clipping that, in general, is less desirable sound-wise. This clip is set about 0.5 dB below digital full scale and is absolutely non-adjustable other than how hard one drives a signal into it. The "CLIP" setting engages two parallel clippers, one in the A to D path and another in the XLR output path after any transformers. With effort and extreme hot levels one can still reach digital full scale, mostly due to the effects of severely squaring up a signal and its effect on anti-alias filter ringing plus the fact that while non-feedback analog clipping may be somewhat preferable, it is still analog and is not 'perfectly mathematical'.
Besides that mode, there is a mode called "BOTH" which engages both the "CLIP" setting described above plus the "LP LIMIT" mode. "LP LIMIT" is set up for some of the extremely hot pre-compressed tracks a mastering engineer gets today. This is a fairly complex setting that watches the input signal and alters the FET limit character once the signal is sufficiently loud. Then it allows the FET limiter to pass a little extra highs and mostly limit lows, thus preventing some of the 'dullness' often occurring with limiters and some of the distortion that can occur with FET limiters in particular (but one of the reasons we like them). Each of these three modes (LP LIMIT, BOTH, CLIP) are intended for the challenge of loud aggressive rock mastering or other situations where a little artistic freedom to shape the sound and push the 'limits' may be called for. Of course, it all depends on how hard one drives the Slam! and pushes into these circuits so there can be a large range of effect from virtually transparent to in-your-face craziness. These modes will not suit every task, nor is "CLIP" a magic process that guarantees a hit - it still requires taste and discretion, and our best advice is that a little goes a long way.
OK, on the RELEASE knob of both the regular and mastering versions of the SLAM! is a setting (furthest counter-clockwise) also called CLIP. This is a variable clipper where you are encouraged to adjust the threshold and attack switch to set up an effect. Essentially it speeds up the timing circuit for the limiter and the FET is allowed to operate on the waveform rather than the envelope of the signal. There is still some shaping of the control signal so that it isn't as 'buzzy' as pure clipping. So this clipping circuit is essentially a bonus effect that can be used to radically treat a signal and probably should be mixed with the straight signal at the console, where one can also EQ both the raw and clipped channels and mix to taste. We should point out that the "LINK" switch should not be used and that it would be rare that using say the right signal to clip the left might be useful. This effect is intended for individual tracks where a severe distortion effect might be cool (like raunchy guitar, synth, or snare) but won't have much usefulness on mixes or essentially clean tracks. It seems to works best on sounds that are already somewhat crunchy and where some added nastiness or edge could be fun.
So, there you have it, two or three types of clipping available in the mastering SLAM!. Which brings up a good point - 'CLIPPING' is a pretty general term for overload distortion where the tops of waveforms are chopped off because it can't go any higher. Why it is pretty general is because every device seems to have its own signature clip sound, even though simple theory might suggest much more similarity sound-wise, we know in practice that this isn't the case and each device has its own overload character. Some distortions are OK for some sounds, some to be avoided at all costs and some that might be described as magic when you get it set up just right - and there is the big hint - usually the sweet spot is pretty small and it really is a matter of being fussy with levels and faders to make it work over the distance of a song. You don't have the benefit a guitar player has with immediate touch and pick force to create the sound, you are probably working with recorded tracks or the musician may not be hearing the distortion effect (it helps if they can) so play those faders to set up drive and return levels throughout the song to really make it work. That's an old trick. Unfortunately, there is some buzz on the net suggesting that "all you need" is some vintage whatever overdriven and you get amazing sounds, like push this button for a platinum record or take this pill for instant enlightenment. The reality is that it still takes work, musical taste and chops. The magic is not only what you use but when and where and then how you use it.
Hi guys, I just got off the phone with my dealer. Finished the order of what I think is the finest analog front end/plug-in for any DAW on the market today: Manley Gold Reference Stereo Mic. Manley SLAM! with digital I/O Manley Massive Passive Wouldn't you agree? ;-)
Hutch: I envy you. That is a good chunk of my dream system. Add a DACS mic pre and a pair of Royers and a few pieces from GML or Cranesong and Hutch would be a happy camper recording anything that moved.
Well, I have a question about the combo SLAM!/Massivo:
Using the Massivo as a side chain EQ is a no-brainer, but what are the hookup options to use it pre or post limiter in a: "front-end" or (D/A > Massivo > Limiter > A/D or D/A > limiter > Massivo > A/D)
You can EQ before limiting like this:
a) SLAM!’s DAC 1/4” balanced O/P to Massivo IN. Massivo O/P to SLAM line in which automatically goes to ADC.
Or EQ post-limiting like this using "Expert Mode":
b) SLAM!’s DAC selected, “expert mode jumpers set” , 1/4” O/P to Massivo XLR in. Massivo 1/4” O/P to SLAM! XLR balanced O/P (yes, feed the output) (actually just the transformer is bypassed using the 1/4”, you are actually feeding the FET drive pick-off point and ADC)
Sorry, no way to insert between the Mic Pre section and ELOP Limiter section. We debated having this feature but it would have required twice the number of tubes, or chips in the signal path, so we passed on officially offering that option. The issue was/is “would it hurt the sound?’ Extra stuff in the path would have compromised it. The ELOP is married to the first stage, just like we did in the VOXBOX.
But as described above, you can get inbetween the ELOP and the FET limiters and insert between those two.
Also, is there any way to go: Mic pre (or instrument in) > A/D > digital into FX unit > D/A > limiter > analog out ??????
Same basic reason as above. While it would have been nice to allow any of these modes and it was certainly possible (if we were a company that marketed features and not sound quality), it would have countered sound quality. Sometimes, we have to make difficult decisions to eliminate features and flexibility if those features would overtake primary goals of ‘minimalist class A all-tube signal path’ or end up costing outlandish amounts.
While we knew we were putting in a fine Mic Pre, to be honest, we didn’t expect the reaction it has gotten. We might be able to add a chip based Mic Pre line driver for you. It might be weird though because there is some ‘magic switching’ made possible by integrating the unit and NOT having a dedicated Pre out. For example the ELOP? limiter switches to the ‘Pre-MicPre’ signal point (taking its sidechain from the limiter section as usual). Also we have ‘muting’ circuits on the mic pre for non-mic/di modes to prevent weird leakages and low level distortions. These would have to be removed and you would have to live with reduced performance for the sake of an interesting patch. One also has to take a good hard look at input and output jacks, and how the controls are shared. For example, Mic & line share the XLR, Mic Pre and Limiter share the INPUT level, and Source selection switch, isn’t ‘just’ simply switching which path goes to the Limiters. Simple yet complex.
So it would appear it's not possible to insert an external compressor into the chain after the mic pre and still use the ADC option - am I reading it right?
Sort of - The mic pre circuit has a high impedance output not suitable as a line driver, and adding circuitry there would have compromised performance, so there is no standard brainless "Insert" per se. Plus the mic pre, depends on X amount of gain added in the line driver, plus benefits from having both gain controls, etc.
However, if one reads the manual, there is an "Expert Mode", where one changes a few jumpers indicated on that block diagram, which allows one to take the signal from the 1/4" output, route it through any desired processing, and return it through the Male XLR "output" (doubles as an Input to the ADC and FET drive point because transformers are bi-directional) and accomplish what you are actually trying to do, yet better than a simple straightforward traditional "Insert".
The advantage is that one gets the limiting where it is optimal, the sidechain and metering where they are optimal (each side of the external box) plus gets a more-or-less passive input to the ADC. The downsides are: 1) It requires a special cable sometimes, 2) It does require a bit of brains because the SLAM! will seem flakey if the 1/4" is used without a return to the Male XLRs in "Expert mode", 3) The Slam! needs to be opened to change those jumpers, and may require needle nose pliers and the manual.
Anyways, about 25% use SLAM! in "Expert Mode" daily and do what you are trying to do, and are loving it. Of course, we'll also repeat that, "The Slam! is not the easiest of all audio gear to use, and limiters in general are challenging and may not be appropriate for everything. That said, how many guys overuse the L2 or digital brick wall multi-band limiters, given that they damage music worse? Its just a tool, and the tools we need to rely on most, we carry above our necks. That is the best real hint we can give.
I am still so confused. How do I hook in this "Expert Mode" and patch my Massive Passive EQ in between the ELOP and the FET? How do I go: MICPRE -> ELOP -> MASSIVO -> FET -> A/D? Spell it out Step by step for me:
Set the jumpers inside the unit to "expert mode" following instructions on page 21 section 4 "changing jumpers" of the owner's manual. (It is also called "advanced mode".)
Get yourself a pair of male XLR to TRS 1/4" cables and a pair of female XLR to TRS 1/4" cables. These should be wired tip to pin 2, ring to pin 3, and sleeve to pin 1.
Run a set of your 1/4" to male XLR cables out of the unbalanced 1/4" outputs from the SLAM! into your Massivo input XLR jacks. Come out of the Massive Passive 1/4" Outputs using your 1/4" TRS to female XLR cables and run those into the SLAM!'s XLR transformer balanced output jacks. Yes! You come back into the SLAM! through the output XLR jacks.
This would be for a "live" application with a multi-channel FX unit in the mic-path.
True, but we already build the VOXBOX? which is a tried and true live work-horse and a stand-alone AD/DA is in the planning stage. For complete routing flexibility, this would be a cool live combo (overkill perhaps). The SLAM! was intended more as a DAW insert or front end or back end (notice that we used the word OR rather than AND). To do all 3 approaches at once, would ‘best’ be done by several boxes rather than just one. Of course, if sound quality were not an issue, it would be easy and cheap to do with a bag of op-amps and jacks.
And finally, I want to put both units in separate standard SKB rack cases. Is the "headroom" in 2 (SLAM!) and 3 (Massivo) unit cases enough to provide the needed air flow?
We suggest at least 3/4” clearance top and bottom for each unit to maximise life and minimise repairs. They are not as hot as some tube gear, so you might get away with no clearance, but expect reduced life on the electrolytic caps. There are 4 tubes in each, plus the SLAM!? has many regulators & relays to help make it warm.
Thanks for your help and most of all for providing me with such outstanding recording equipment.
I’m
sure you’ll get the results you expect. Thanks for the kind words and
support.
--Hutch
More SLAMMY questions and answers...
Question: There's no word clock out, correct? How would one send clock to other units? And why is it that Hutch seems to advise to use an external clock sync for other units vs. using the Manley? Or did I misunderstand?
Conventional wisdom suggests that the best approach is to use an A to D's internal crystal for clock and send that clock everywhere, especially the D to A's. The reasoning is that A to Ds are most jitter-proof when locked to their internal crystal clock rather than if marginally locked to some external sync. This is generally true but the SLAM! converters are a special case. They are permanently locked to a high multiple of 192K crystal clock and use sample rate conversion to talk to the outside world. This software process effectively cleans up both clocks. Standard operating procedures due to typical inadequacies of jitter tolerance may not apply to SLAM!.
There are several reasons for not including a dedicated word clock out. Some of this is in that gray area between fact and opinion. I have rather strong feelings about jitter and the fact that so few converters are particularly good at rejecting it and that most need a word clock box to sound OK. This is why we took the approach of using ASRC instead of PLLs, and this made our converters jitter immune (Benchmark does a similar thing). Our process also pretty much eliminates the typical phase noise issues of the internal crystal oscillators so they don't need to be "special". This means that if we had put on a word clock output it would be just a buffered version of the raw crystal which may be OK, but wouldn't really compare to a good word clock box like so many people use today and really is the best answer for big set-ups and multiple converters.
The primary benefits of good word clock distribution is 3 fold. A) It allows a studio or complex to use a form of house sync, whether this is video, a stable precision word clock or simple clock (cleaned up) as generated by the DAW. The latter is used when clock rates change daily. B) The DAWs and other digital devices are generally considered to be jitter tolerant and the next device where clock becomes important sound-wise is the DACs. The SLAM! DACs are jitter immune and so there is a wild card scenario as to whether SLAM!s generic crystal is adequate for unknown DACs after X amount of raw distribution. An external DAC that is that jitter sensitive is probably best served by a word clock box intended for that function. C) One can usually use the SLAM!'s DAC to monitor or as a key section in the chain and achieve almost perfect jitter immunity without all the above convolutions in many scenarios. Just set the DAW to follow SLAM!. D) Word clock wouldn't be needed if other converters were like SLAM!'s.
The above overview has a few implications: 1) The SLAM! A to D does not suffer when following an external clock. 2) An external clock box will probably be a more stable a clean reference than the SLAM!'s crystal output due to the fact that the external box has a few PLLs to clean up their own crystal phase noise or outside references. 3) The word clock box allows easy selection from several sync sources. 4) Distribution of clocks is equally important and this requires a healthy number of BNC and XLR outputs - again the proper job of a word clock box. 5) The SLAM! AES/EBU output can feed said clock box and the mission of clock distribution is then elegant rather than possibly jury rigged.
In other words, if you need a great word clock distribution scenario then the right method includes a box designed expressly for that task. It should be up to accepting AES as a master clock which SLAM! can supply. Slam! is also meant to follow it, if a different reference is desired, but without the usual draw backs. We didn't create the SLAM! to fix a lot of other questionable converters, and primarily not to have the same flaws itself.
Question: And as for Maximum integration - does that include metering integration? If not, there's a reason to go with a standalone box. What part of the maximum integration with the SLAM! would make one feel that it is too advantageous to pass up, especially if ("if" being the operative word at this point) there are other factors lending advantage to an external box?
Can't ask EveAnna exactly what she meant there right now but my concept of "integration" is a single box that interfaces easily with any DAW (including as an "analog insert"), and acts as a very high quality versatile interface to and from other gear. This is why there are mic pres, DI, and limiting done where it is most beneficial, metering both in VUs and LED peak style and a tasty amount of class A tube color. Of course, HEDD is a lovely converter with my favorite simulations of tubes, but frankly the SLAM! converters have an advantage in the time domain where goove and feel are significant concerns, for me anyways. The LED meter also indicates A to D overs in every mode. While it may be tempting to draw comparisons, methinks the SLAM! is in a rare category in the sense that it is all in one box and designed to work synergistically - the diverse sections blend in a nice way.
Question: Again, thanks for the response. I have no doubt in the quality of the converters, judging from your reputation, Hutch's documentation in the manual (fascinating!) and what folks like Lynn and Fletcher have said (as well as most involved with the 3db comparison.) I'm sorry for pestering, but for me this is a sizeable investment, and I just want to research as much as possible.
Very wise to ask and ponder. Just read your original questions below and maybe I can help there too. As described above the clock question depends on how much distribution is needed and other converters that might benefit. I am guessing that you have a clean simple high quality set-up that doesn't require much in terms of sync distribution. The SLAM! can be the AES master clock to your DAW, and the usual benefits of word clock won't apply to SLAM!s jitter immune converters. With other converters you may find that a word clock box is mandatory but not so with SLAM!s converters. Makes it easier, less concerns apply.
In regards to "minimalist" the A to D uses the SLAM! (shared) output transformer as the front end to the converter. It doesn't get any closer to minimalist and passive than that. Other converters use X number of op-amps. There are a few advantages & disadvantages compared with a stand-alone converter. The advantage is that the limiter and LED meters watches that "input/output" and reacts accordingly even if an EQ were inserted in that path. The disadvantage is that as a stand-alone it is so minimalist that you don't get gain controls (we thought there were too many already). Of course this only applies if the main part of SLAM! is used for something else and is in a different path.
Hope this helps, sorry for complex answers but these are complex questions not because of you, but because of the hoops most guys go thru because so many converters are too jitter sensitive. Methinks excessive band-aids, and another page we'll cringe over in the upcoming history of digital audio.
--Hutch 9/2003
PS - We will be introducing a stand-alone converter (someday) based on SLAM!s with 3 independent word clock inputs and outputs clocked by astoundingly cool DDS system (Bigger Ben). So this will do everything that you are thinking about the best way possible today but won't be as good of a $ deal as just going for the SLAM! converter option, nor be quite as minimalist. It is also 6 to 9 months down the road at least as opposed to 'available now'.
Question: I'm curious about the need for two compressors? I'm just starting to get into mastering. I have ordered the mastering version of the SLAM! Do you think that the SLAM! would cover that need since it has two limiters per channel? I understand the need for two EQ's, and the only reason I could see having two compressors, is to use one to compress, and one as a brickwall limiter.
Hutch's Reply: Interesting question. The answer hinges on the fact (or opinion) that all compressors do sound different, plus the desirability for different sounds in ones’s arsenal. Perhaps, we don’t “need” multiple compressors, and perhaps we don’t even “need” to compress at all, but there does seem to be advantages to having the choice and it seems that with hundreds of compressor/limiters on the market and most studios owning X number of different units and most mastering studios regularly chaining 2 or 3, that its all about options and getting the most out of each, if indeed compressors are different sounding and if most are at their worst when over-used. Put another way, each generally begins to show its character beyond a few dB of gain reduction, so some guys use several units to minimize obvious characterizations. All of us designer-types wish we could build that ONE compressor that did everything and did it all best, but so far none of us has. We can make one that maybe does a few things best tho’.
Question: Can the FET and ELOP? limiters be used simultaneously and independently of the converters? I was wondering if, during mixing, I would be able to use the converters to go to my Masterlink.... and at the same time use the ELOP and FET on various individual tracks.
Yes on the ELOP?, no on the FETs and Peak meters. The latter are tied to the XLR output which can be used as an input to the ADC. The DACs can always be used independently.
Question: Can I insert an EQ in between the ELOP and FET limiters?
No, one cannot insert between the ELOP and FET sections basically because the levels around there are -20 dB, and are at rather high impedance, and they are unbalanced, and absolutely unsuited as a line driver. And No, one can't use the bantam jacks that way, as they are just meant as side-chain inserts to control how the EOP or FET responds (for example inserting an EQ with a 7K boost can provide de-essing).
However, one can use "Expert Mode" to accomplish a similar goal, but the actual effect is rather optimised and thought out - but somewhat un-intuitive (and why we call it "expert mode"). It is described in the manual and is worth a try. The end result is that:
1) The ELOP is first in the chain and responds to the raw un-EQ'ed signal.
2) The FET is next in the chain and responds to the EQ'ed signal.
3) The EQ is next in the chain (see I told you it was non-intuitive) What is cool is the signal is limited before the EQ electronics but the sidechain is responding to the final output that the A to D would see. That prevents much EQ overloads.
4) The SLAM! LED output meter and A to D converter is last in the chain. The FET side chain is here too - strange loop.
Anyways, this should really do what you need. Why didn't we add 4 or 6 op-amps into a simple passive class A signal path to provide some convenient but compromised and questionable patching path? We were just trying to maintain some sound quality, and we saw a clever way to pull it off, that had a little drawback of being a bit complicated.
Question: This will probably sound dumb, but when setting the input level on the SLAM!, what should I be looking for on the meters? Should the VU hang around 0? That seems pretty quiet. Should it be in the red? Should I be looking at the LED meter instead? I'm using a Roctron Prophesy guitar processor XLRs with "MIC" selected as the source on the SLAM!. "9:00" on the input knob sets the VU to around 0 for most sounds, while the 12:00 position pins the needle to the right.
The first rule is: "There are no rules". OK maybe "If it sounds right, it is right". The second rule is "with music, trust your ears, more than your eyes".
Regarding the meters and input / output levels: Setting the input level so that the VU in INPUT mode is near ZERO will usually be the safest especially in regard to FET Limiter distortion. One can then easily set the THRESHOLDS and OUTPUT Levels. If you are sending to an A to D converter, I might suggest using the LED Meters to set the OUTPUT LEVEL rather than the VU in OUTPUT mode (the latter requires a bit of interpretation/experience because VUs are slow).
So all we are saying is, if the VUs (in INPUT) are pinned, one might be getting a little more FET distortion (they do that), but one might not know how far the VUs are pinned and when extreme, might result in the preamp clipping, but there is quite a bit of headroom before that is likely. For a raunchy guitar sound, you have my blessing to go nuts and just go after a sound that you like, regardless of what the meters tell you, after all, some distortions can be a lot of fun. I might warn you, that if you are clipping the A to D converters occasionally, that at least you verify, that the sound of your A to D clipping is OK, because it often isn't. This is why one might want to use the LEDs both on the SLAM! and A to D to prevent too hot of an output. Generally, one can be -10 below Digital Full Scale without problems.
Regarding the knob positions: Don't worry about 9:00, 12:00, etc. If it were possible to always have pots set at 12:00 we wouldn't need them then, and we could have saved a bunch of money and panel space. They are there to be used. Input and Output levels are supposed to be kinda flexible. In fact the way you are using it, that Input Level in MIC mode has about 60 dB of range. This makes it a bit touchy, but it needs to accommodate a many situations.
Hope this helps, and hope the SLAM! is helping get some killer tone.
-- hutch
I love the Slam overall, however when using it across my 2 mix I noticed it really dulling the mix. I hired a good tech and we did some tests. We mix on a Neve 8058 that has been modded and tricked out by Pat Schnieder. We put an oscillator straight into line input as a control and the other side through the unit. We found when engaging our (perfectly calibrated) mix insert that the 15k dropped by 1.75 db. We also found when running a tone into the unit and then into a normal line in (a scenario we might use when utilizing the unit as a buss comp) that the 15k dropped by 3.5db. The tech therefore contends that the Slam can't drive a 600 Ohm load. Is this possible?
Hi
Yes, you and your tech pretty much diagnosed the problem. Admirable. The root cause is the output transformers which droop HF somewhat into 600 Ohms.
One cure might be to use the unbalanced outputs, which won't droop that way.
On a similar note, interestingly, capacitively loading the output transformers (like a very long cable) tends to create a HF rise or peak. Both of these symptoms are very common for output transformers and are almost never noticed but might explain different results for different people or situations. About once every 2 years somebody notices.
If the tech is feeling brave, there is a network (R&C) loading the OP transformers optimally set for 10K loads and these might be changed to get closer for 600. We use a 3K & 10K square wave plus freq sweeps and a RC substitution box to arrive at good values. Doubt whether it would be enough.
However, the best answer is to drive a higher impedance input, because tube circuits in general (ours included) lose some headroom driving low impedances. And while it should still should be fine, one hopes to optimise.
Lastly, limiting may be perceived as a dulling factor because it reduces transients and a lot of HF is in those pesky transients. One can use a longer attack time or boost a bit of HF EQ to compensate.
-- hutch
관련 상품


배송안내
|
| ||||||||||||||||||||||||||||||||||||||||||||||||||||||||||||||
교환 및 반품안내
|
||||||||||||||||||||||||||||||||||||


이미지 확대보기SLAM! Stereo Limiter and Mic Pre


비밀번호 인증
글 작성시 설정한 비밀번호를 입력해 주세요.
장바구니 담기
상품이 장바구니에 담겼습니다.
바로 확인하시겠습니까?
찜 리스트 담기
상품이 찜 리스트에 담겼습니다.
바로 확인하시겠습니까?

평일 오전 9:00 ~ 오후 6:50
토요일 오전 9:00 ~ 오후 3:00
은행 : 국민은행
예금주 : 이정석